Art work overload.
Yep, being the parent of two kids that go to preschool a few days a week as well as love to do art projects pretty much anywhere, the art projects pile up. Big time. I purge as best as I can when they aren't looking (let's be honest, not every thing my kids create is a Picasso) and save the stuff that is really special or unique, but it still piles up like mad.
I've seen a few ideas on pinterest which I'd like to incorporate sometime down the line.
Now, this is shown with photographs, but I've seen this idea of photographing all the artwork and displaying as one large collage. That also suggests that I have the time to go through all the art work, photograph it and organize them, find a way to have it printed (not that I would go that large), etc. But it's still something I'm thinking of down the line.
I also like the idea of, and this is a bit more practical for me, to make a yearly book with the artwork from that year in it (by photographing, but still saving special pieces).
In the meantime, I still wanted a special way to display their artwork and encourage them to continue making such beautiful pieces.
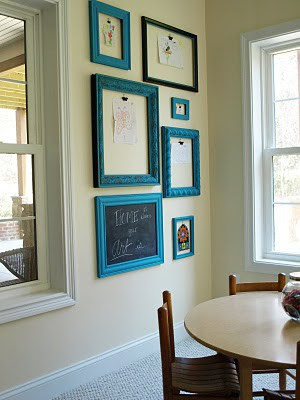
I had seen this display on Pinterest and loved it, and thought frames in a bright fun color would be perfect in the playroom. I especially love the mix of different sizes and frames, but for now, I went the uniform route.
Enter, IKEA frames. And enter, picture placement.
We bought the frames on our last trip to IKEA (it's a good 2.5-3 hours from us) when we were also buying the BESTA bookcases. I bought 2 of each in four different sizes. then I traced each size onto paper the kids had on a roll so I could play with hanging the frames that way instead of trying to actually do it with the frames and putting needless holes in the wall. It worked really well, and this was the placement I settled on, but I think I changed it twice before landing on this one.
I then got to work, as I didn't want the white frames - I was thinking orange or yellow, and at our last trip to Lowe's I asked Noah and he voted yellow. Sold!
I thought maybe I could just paint them since they are wood, after all, but they almost seem to be covered with a plastic-like coating, so had to go the prime route after all (and really, painting these was just a big huge PITA, to be honest).
After a few coats of primer, I did the yellow (but forgot to take a picture of that part of the process).
After putting a sawtooth hanger in the back of each frame, I also used those Command poster strips to keep the frames from getting knocked back and forth on the nail. I hung them all up, secured the strips, and stepped back to enjoy!
I'll reveal with full artwork when I show you the entire playroom, hopefully soon! I also still might put some cork into the center of each so that we could just use thumbtacks to secure the artwork....still deciding on that one!
So, how about you? Do you have any clever ways to store/keep/display your children's artwork?


0 comments:
Post a Comment